Hello there!
I wanted to share this DIY that I had done during the holidays. I collaborated with Lisa and Shyma and it was so fun! Make sure to check out there videos.
This DIY is not only great for the holidays but can also be used for any occasion or if you simply want to spice up your home decor. I created polaroid type photos using pictures from my phone and had printed them out and cut them on scrapbook paper. I like the polaroid look and it would be even more fantastic if you have an actual polaroid camera. It's a great way to display your favorite photos and keep them for memories.
From my previous DIY many of you asked for a DIY tutorial about the pineapple pillow that was featured in the video. The pineapple pillow was a gift from my boyfriend and I included it with the scallop pillow just for decoration. Since I received so many request for a tutorial I spent weeks trying to figure out the right materials and how I was going to put this all together. So the video above shows my outcome. It came out to be more on the square side so that is why I am calling this an "inspired" pineapple pillow. As always the materials are affordable. You can purchase everything from crafts stores and all together this cost me less than $4 to create one pillow. Instructions and more details are included in the video. I hope you enjoy!!
Spring Season is almost here! Do you have a favorite trend or particular look that you like to sport during the season?! I'm loving laser cut outs, I like the patterns that are used and laser cut outs are very eye-catching. This clutch can be worn two ways, cross-body(comes with a detachable gold chain strap) and as a clutch. I'm mainly using it as a clutch the color is perfect and since I am such a neutral girl, I am trying to incorporate color into my wardrobe. This clutch that I have is from ShopLately you can click the link if you would like to see detailed photos and/or purchase the clutch.
Also, come and visit my my profile on Shoplately! HERE
My personal invite to ShopLately HERE
When it comes to my crafty DIY projects, I am always thinking about projects that are affordable and easy for anyone to create. Here is another affordable and easy, room decor DIY. Learn how you can create your own scalloped map garland which is perfect to spice up a boring, empty wall. Watch the video to learn or follow the simple steps listed below.
You will need:
World Atlas or Map (found mines at the thrift store for $1)
cotton string
round bowl (preferably plastic)
decorative clips (damage free hanging)
glue stick
scissors
Step 1
Choose your favorite destinations. This could be a state, country, etc. I chose 11 places which made 11 scallops.
Step 2
Place plastic bowl on your chosen destination. Keep in mind, to create the scallops you start with a circle and you will be folding it in half. So if there is the name of the destination, for example, Brazil. You want to make sure the name will show on the correct side and not in the fold.
Step 3
With scissors, cut what you have traced and you should have a circle.
Step 4
Fold your cut out in half. Again make sure you have the fold on the correct side (name showing). Set aside.
Step 5
With cotton string measure the amount of string needed, this depends on how many scallops you make. When you have your desired length, tie a double knot on both ends. The loops are what will hang from the decorative clips.
Step 6
With your cut out and glue stick, apply glue to the middle and edge of the cut out.
Step 7
Place String in the middle of your glued cut out. Press down and hold in place for a few seconds.
Step 8
Tah dah! You should have your first scallop. Continue with the same steps listed above until you have all scallops. Use the decorative clips to hang on your wall. You are done!
Today's post I am bringing you an affordable and easy room decor DIY. Using Scalloped trim and a table napkin, I created a throw pillow. You can watch the video above or follow the directions listed below. I hope you enjoy!
Materials Needed:
Cloth Napkin - can be found in the dish-ware section at Target, Macys, etc
Scalloped Trim - Craft Store
Pillow Stuffing Sutffing - I recycled my old pillow
Glue Gun
Scissors
Step 1
Starting with cloth napkin. Fold in half and glue three sides, the fourth side should be left unglued (it needs an opening to insert stuffing).
Step 2
Measure with scallop trim to determine how much trim you will use for the cloth napkin. This step is simple because the cloth napkin has a set measurement. Basically, you just need to follow the edge of the cloth napkin. Measure, cut, and glue on to the edges of the cloth napkin. Let glue dry.
Step 3
Cut open an old pillow to use the stuffing. Insert as much stuffing needed for pillow.
Step 4
Once pillow is stuffed and shaped. Glue the end to close. Easy right?!
Use as a throw pillow for a little extra decor on furniture.
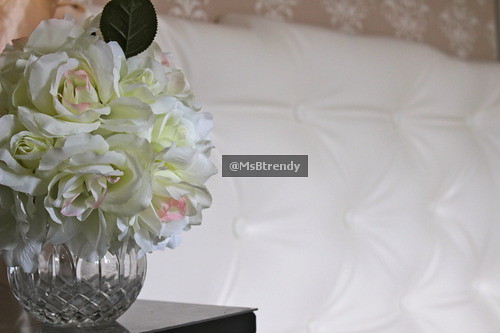
I've always loved home decor, similar to fashion you are able to express your mood and play with different colors. When I was little my dad built a giant bunk bed where I had my bed at the top and below I had a play area where I kept my toys and from then on I've always enjoyed decorating my room. Some of you may have noticed the background of my new videos as well as a few pictures on my Instagram . About 2 months ago we (my boyfriend and I) redecorated my bed area. My bedroom theme that I am going for is upscale, classy with a touch of contemporary. We are still in the process of finishing my entire bedroom but for now this is what we have done. I will be uploading a home decor video explaining further details.
P.S. from the patterned wall to the headboard, my boyfriend made it! (I was the one who came up with the design and did the painting, along with being his assistant through the entire process lol) BIG thanks to my boyfriend, he is such a handyman! Without him my dream bedroom would not have happened!
If you have any questions, contact me through twitter